A properly trimmed brisket is essential for making the best smoked brisket possible. Trimming your brisket is an art that takes practice, patience and the right tools (a sharp knife is most important).
After a few simple steps, you’re brisket will be ready for a dry rub and to head into the smoker. We’ll go through the steps of removing excess fat from the fat cap and edges, along with removing the silverskin from the bottom side.
Don’t stress and don’t worry about being perfect (mine never is). We aren’t professional butchers. We’re just trying to make it the best we can, while not spending too much time or effort.
Why You Should Trim Your Brisket
The amount and thickness of fat left on the brisket is one of the key factors for how it will cook in the smoker. Too much and it won’t render and you won’t get as much flavorful smoke penetration. Too little and the brisket can dry out.
Sometimes you don’t need to trim your brisket. If you purchased a brisket flat by itself, there is a chance that it is already trimmed. Check it out before you start slicing in.
The Goal
The goal of the trim is to make an even shape and clean-looking surface, void of pieces that will burn during the cook and an evenly thick fat cap to about 1/4″ thick. We want to remove anything we won’t eat. The uniform shape will be optimized for smoking, allowing the air to easily flow over the surface without any obstacles and angles that will disrupt the air and smoke.
It’s really up to you as to how much time you want to spend trimming, taking off as little or as much of the fat as you would like. You can spend just 5 minutes or 30 minutes depending on how much work you are willing to put in.
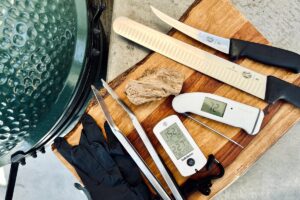
🔪The Tools You’ll Need
- Sharp boning knife – A narrow curved boning knife is perfect for maneuvering around the fat. But if your sharpest knife is something else, you might want to use it. Sharpness is more important than shape.
- Large cutting board – The larger the better because a packer brisket is big. If you don’t have a large cutting board, you can use a large sheet pan to trim on, just be careful not to let your knife touch it.
- Nitrile or rubber gloves – They keep your hands clean and also give you a better grip on the fat as you trim.
- Paper towels or a clean kitchen towel.
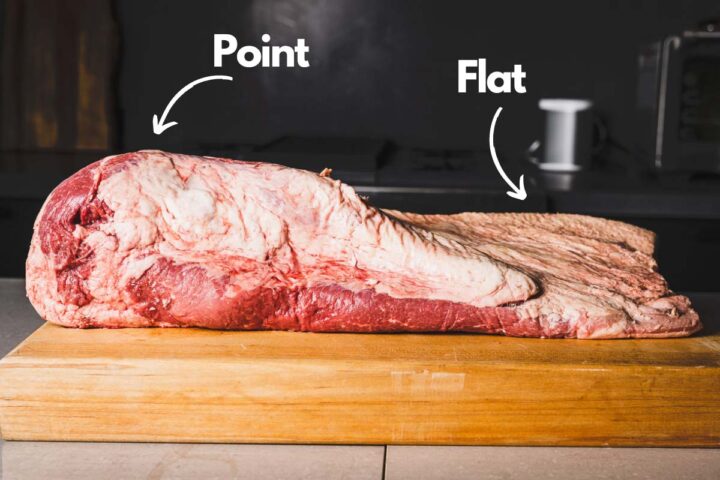
🥩 Know The Anatomy
The Point (aka Deckle) is the thicker, more marbled with fat and richer part of the brisket. It is much more forgiving to cook. The point is usually where burnt ends come from.
The Flat of the brisket is the leaner, thinner part of the brisket. It is fairly even in thickness, so it will cook evenly. Being less marbled, it can dry out and get tough, especially if too much of the protective fat cap is removed.
Learn more about brisket in the Brisket 101 Guide.
How to Trim a Brisket
Trimming your brisket is the first step and a very important step before you season and cook it. Here are the steps to follow for trimming your brisket for optimal cooking in the smoker.
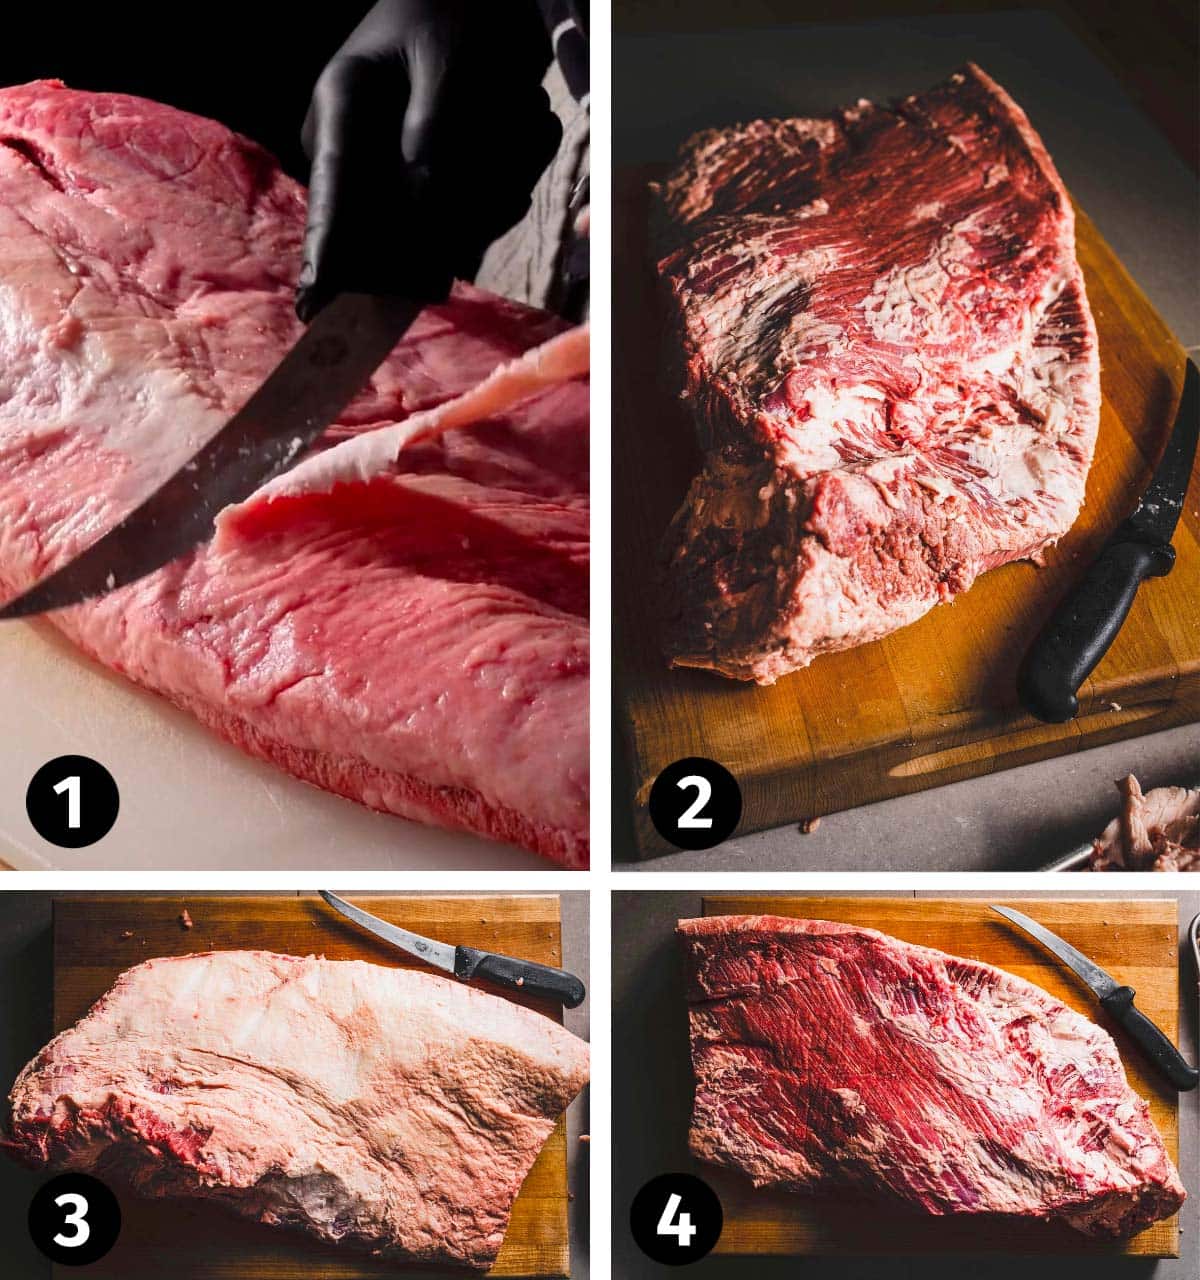
- Place the brisket on a large cutting board fat side up directly out of the refrigerator. Dry it off with a few paper towels to make it less slippery to handle. Cold fat is much easier to trim, and drying it off makes it less slippery.
- The fat cap (top side): Using a very sharp knife, shave off the waxy layer, trimming the top fat cap and the point down to about ¼” thick layer, making it as even as possible.
- Square it up – Slice off thin parts along the edges of the brisket on the flat. Also trim off any loose or hanging pieces that can burn.
- Bottom side – Flip the brisket over. Trim up the bottom (start easy). Remove the fat seam that is between the flat and the point.
- Remove the silver skin – Trim off any hard, white pieces of fat that are embedded in the meat, which won’t render during the cook. Trim off a lot (or a little) of the silver skin (sinew) from the bottom of the brisket. It will not break down or tenderize during the cook.
- Now season and smoke that beautiful brisket! Don’t forget to save the trimmings to make tallow.
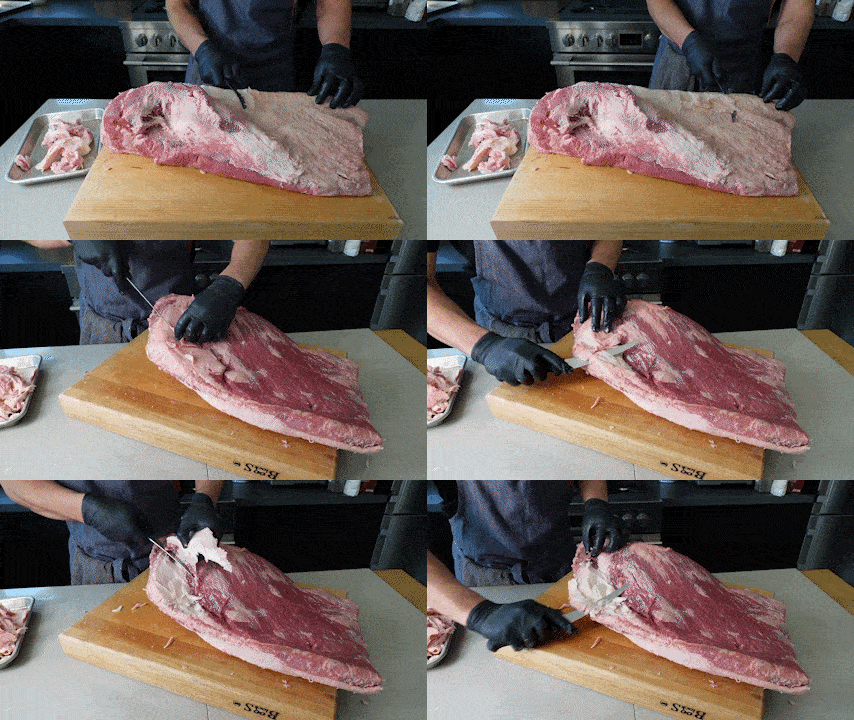
Tips for Trimming Your Brisket
- Trim the fat when the brisket is very cold. Cold fat is much easier to slice through. Either trim it when it’s right out of the refrigerator or you can even place it in the freezer for 10 to 15 minutes to chill it down first.
- Wear food-safe nitrile gloves for easy clean-up and a better grip while you are trimming.
- Dry the brisket off with paper towels before trimming to make it less slippery.
- Use a very sharp knife and a large cutting board. A stiff boning knife is the preferred tool to easily maneuver and avoid slicing that valuable flesh. Using a dull knife will make the task much more difficult than it needs to be.
- Ask your butcher to do it for you if it’s something you don’t want to do yourself (just call ahead).
- Buy one that is already trimmed to avoid trimming the brisket altogether. Some briskets come pre-trimmed, which saves some time but does give you less control.
- Save the fat if you wish. The fat you trim can be saved for making homemade hamburgers. sausage, Yorkshire pudding, or it can be melted and used for cooking.

What to Do with the Trimmings
There can be as much as 40% trimmed off a brisket, so don’t let those amazing trimmings go to waste. If it’s a smaller brisket you don’t get many trimmings (that’s great too), just seal and freeze them to use once you have some more.
- Make beef tallow with the fat. Tallow has tons of uses, including adding to your brisket before the wrap.
- Make ground brisket burgers with the red meat plus some fat. You can grind the beef in a meat grinder, or partially freeze and finely chop.
- Feed them to your dog – Cook the red meat (remove the fat) and your dog will love you even more.
- And so much more!

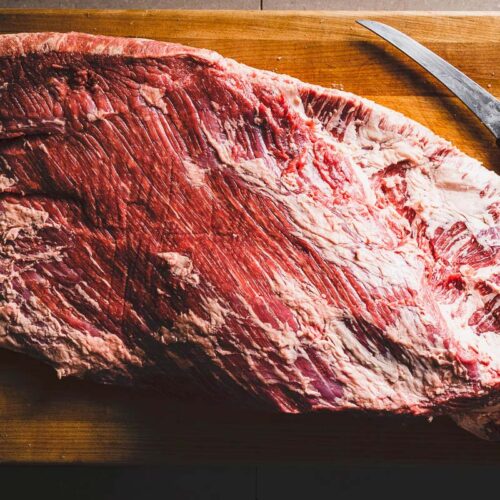

It was really helpful to watch you trim the brisket in that video… thank you for this!